Gast
02.06.2010Howto startup with Maemo and Qt 4.6 – Step2: Configure your IDE
Configuration of Qt:
My last post described howto setup your sdk an ide for Maemo5 and Qt development on the N900 devide. This time i will show you how to configure your ide and setup your first project.
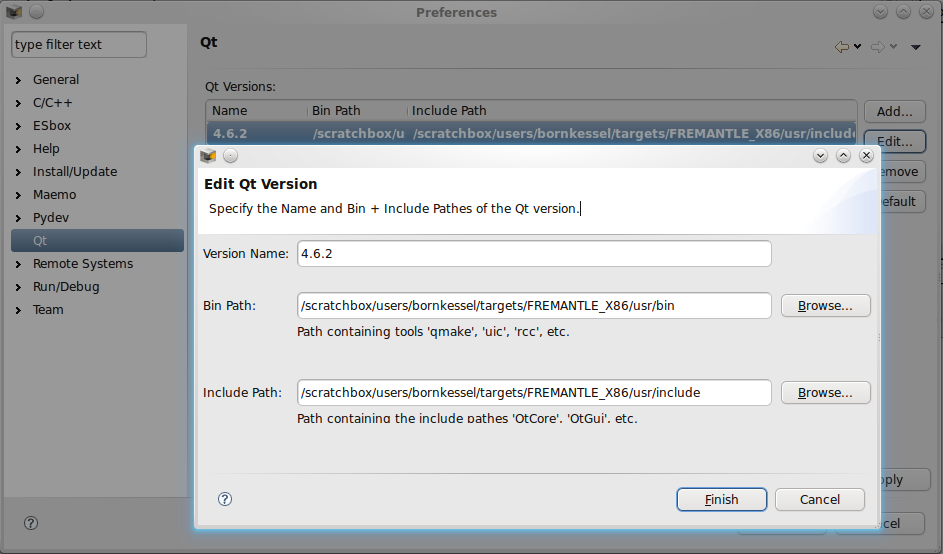
First of all Goto Windows->Preferences_>Qt and add a new entry in the list. The Version needs a label. I chosed the version of Qt. Then you have to add a few paths in the scratchbox environment where Qt and its helper programs are located. Have a look at the image below.

configure your QT version for Eclipse
Check the installed targets:
Goto Windows->Preferences->Maemo->Installed Targets. You should see an entry “scratchbox 1” with two subentries( targets).

your configuration should look like this
If it is not there hit the “Install” Button and select “Scratchbox1”. Complete the wizzard for the fremantle plattform. Next you may install the targets “FREMANTLE_X86″(your emulator) and “FREMANTLE_ARMEL” (for your real N900 device) by clicking on the “Install” button again and chosing “Scratchbox1” targets.
Create a new project:
In the wizard dialog chose “C++ Maemo Projekt” and click Next. A new Windows wil appear. Select the “QT Hello World” template and click “Next”. In that dialog check all configurations if you want to build your code for the N900. Type in an appropriate project name and hit the “Finish” button.
Correct the Qt paths:
It looks like eclipse does not use the same paths for the editor and the build process. To have autocorrection of your source code and so on, you should check the includes. Goto project properties ->c/c++ Paths and Symbols->Includes. Check the paths for the different configurations for the “GNU C++ language”. I had to remove the part ../qt/Qt… from the path.
Congratulation:
You are done. Now you may add the perspective Qt C++ for visual editing. I will write a separate post for you how to do that. Also remind that you have to add each gui mask, cpp file or header file to the Qt-Project file (.pro) manually. Otherwise if you build a project the file will be not included result.