David Linsin
19.05.2010How to add a “Find Your Company” feature to your iPhone App – Part II
In my first installment, we laid the foundation for todays blog post. So don’t hesitate to head back for a recap, if you need to. You can download the code for this tutorial on github.
If you start the App where we left off, you get the two pins, but it won’t be properly zoomed. In fact, it would look something like this:

As you can see, the pins are not really helpful at this zoom level and it’s definitely not user friendly, if you have to zoom in by yourself. What we need is a way to zoom in, so that the pin and the current location nicely fit on the screen.
That’s exactly what the method centerMapAroundAnnotations at line 108 of our UIViewController does:
if ( [[self.mapView annotations] count] < 2 )
    return;
CLLocationCoordinate2D min;
CLLocationCoordinate2D max;
BOOL minMaxInitialized = NO;
for ( id<MKAnnotation> a in [self.mapView annotations] )    {
  if ( !minMaxInitialized )     {
    min = a.coordinate;
    max = a.coordinate;
    minMaxInitialized = YES;
  } else {
    min.latitude = MIN( min.latitude, a.coordinate.latitude );
    min.longitude = MIN( min.longitude, a.coordinate.longitude );
    max.latitude = MAX( max.latitude, a.coordinate.latitude );
    max.longitude = MAX( max.longitude, a.coordinate.longitude );
  }
}<br/>
CLLocation* locSouthWest = [[CLLocation alloc]  initWithLatitude: min.latitude longitude: min.longitude];
CLLocation* locSouthEast = [[CLLocation alloc] initWithLatitude: min.latitude longitude: max.longitude];
CLLocation* locNorthEast = [[CLLocation alloc] initWithLatitude: max.latitude longitude: max.longitude];
CLLocationCoordinate2D regionCenter;
regionCenter.latitude = (min.latitude + max.latitude) / 2.0;
regionCenter.longitude = (min.longitude + max.longitude) / 2.0;<br/>
CLLocationDistance latMeters = [locSouthEast getDistanceFrom: locNorthEast];
CLLocationDistance lonMeters = [locSouthEast getDistanceFrom: locSouthWest];
MKCoordinateRegion region;
region = MKCoordinateRegionMakeWithDistance( regionCenter, latMeters, lonMeters );
MKCoordinateRegion fitRegion = [self.mapView regionThatFits: region];
[self.mapView setRegion: fitRegion animated: YES];
[locSouthWest release];
[locSouthEast release];
[locNorthEast release];
The code might look complicated, but we can break it down into 3 steps:
- Iterate over all our custom annotations (we only have one) to determine the max/min latitude and longitude
- This results in a triangle locSouthWest, locSouthEast and locNorthEast, that we can use to determine the center for our zoom
- Using the distance between the triangle points and the center, we can fit the map into a MKCoordinateRegion, that will zoom it so that everything fits on the screen.
One thing this algorithm doesn’t include, is the AnnotationView that display the name and location of the red pin. It sometimes happens, that it’s displayed outside of the screen, once you tap on the pin. However, if you add the code above and hook it into the following method:
- (void)mapView:(MKMapView *)mapView didAddAnnotationViews:(NSArray *)views
You still need to add the code, which handles the annotation, but you can feel free to steal it from github. The result should look something like this:
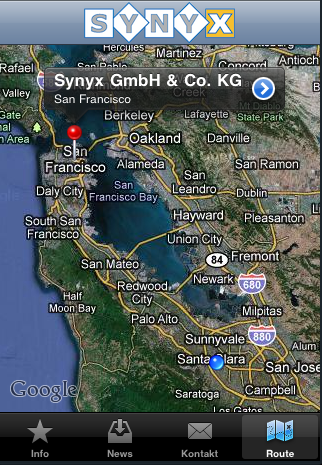
This concludes our little tutorial on Google Maps and MapKit. I hope it was helpful! If you need any assistance, just leave a comment or drop me an email, I’ll be happy to help you out.